Table of Contents
- What You’ll Need Before You Start
- Step-by-Step: How to Safely Clean Bird Droppings from Stucco Walls
- Soft Washing Stucco vs Pressure Washing: What Works Safely
- Best Cleaner for Stucco Walls: Matching the Solution to the Stain
- How to Prevent Bird Nesting on Exterior Walls
- Common Mistakes That Damage Stucco and Void Warranties
- Frequently Asked Questions
Last Updated: September 20, 2026
What You’ll Need Before You Start
Bird droppings are acidic: left on stucco, they eat into the finish, stain the surface, and can carry pathogens. Safe cleaning comes down to the right gear and the right technique.
Never chip dried droppings off with a scraper, putty knife, or wire brush. You will gouge the stucco surface, and those marks cannot be buffed out. The only fix is patching and repainting.
Safety Gear for Droppings Removal
Bird droppings can carry bacteria, fungi, and parasites. Protect yourself first.
- Nitrile gloves
- Safety glasses or goggles
- N95 respirator
- Long sleeves and pants
- Rubber boots
- Trash bags for waste
Step-by-Step: How to Safely Clean Bird Droppings from Stucco Walls
The safe method: soak first, clean gently, rinse fully. Never scrub dry droppings or blast the wall with high pressure.
Step 1: Dry Removal and Pre-Soak
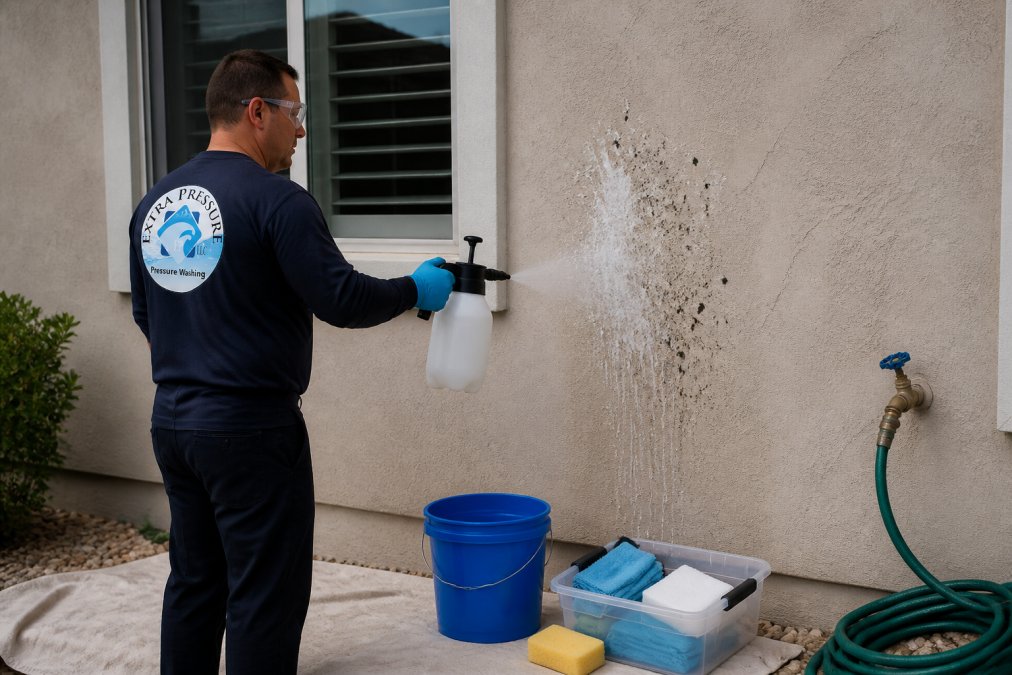
Pick up solid waste with a plastic bag or paper towel, do not scrape it. Soak the stained area with plain water from a garden hose and let it sit 5 to 10 minutes so what is left lifts away instead of smearing.
Step 2: Apply the Cleaning Solution
Mix a mild solution in a pump sprayer. A little dish soap in warm water handles most fresh droppings.
Step 3: Rinse and Inspect
Rinse with a garden hose on a gentle setting. Work top to bottom. Check the wall once it dries.
Soft Washing Stucco vs Pressure Washing: What Works Safely
Soft washing is the safe choice for stucco; pressure washing is not. Stucco’s textured, porous surface lets high pressure force water behind the finish, loosening the bond to the wall; on painted stucco it strips the coating, and damage shows up weeks later. Soft washing uses low pressure and a cleaning solution: the chemical breaks down organic matter and a gentle rinse carries it away.
| Method | Pressure Level | Best For | Risk to Stucco |
|---|---|---|---|
| Soft washing | Low, under 500 PSI | Stucco, painted siding, delicate trim | Low when done correctly |
| Pressure washing | High, 1,500+ PSI | Concrete, brick, driveways | High: cracks, water intrusion, stripped paint |
Best Cleaner for Stucco Walls: Matching the Solution to the Stain
There is no single best cleaner for stucco. The right choice depends on what is on the wall and how the stucco is finished, get those wrong and you either leave a stain or etch the surface.
Match the Cleaner to the Deposit
- Fresh droppings (under 24 hours): warm water with a few drops of mild dish soap. The uric acid has not fully bonded, so surfactant alone lifts it.
- Set-in droppings and light mildew: diluted oxygen bleach (sodium percarbonate), roughly one scoop per gallon of warm water. The oxygen releases slowly, lifting organic residue without the chlorine smell or the risk of bleaching tinted stucco.
- Heavy organic growth, algae, or lichen: a soft wash mix of sodium hypochlorite diluted to about 1 to 1.5 percent available chlorine, plus a surfactant, the same chemistry soft-wash contractors use on roofs and siding.
- Mineral streaks and hard-water staining: a dedicated stucco cleaner from a home improvement store. These are usually mildly acidic, which is why they must never touch fresh droppings, acid on acid drives the stain deeper.
Why the Finish Type Changes the Answer
Stucco is not one surface. The finish coat determines what the cleaner can safely touch.
- Painted or elastomeric-coated stucco: stick to oxygen bleach or dish soap. Sodium hypochlorite at soft-wash strength is generally fine on cured acrylic paint, but it will dull a fresh coat and can leave lap marks if it dries on the wall.
- Unpainted cement stucco: more forgiving, tolerating a slightly stronger hypochlorite mix because there is no coating to strip.
- Tinted or integral-color stucco: the pigment runs through the mix, so it will not bleach out like paint, but acidic mineral cleaners can still etch the surface and leave a chalky patch.
Dilution and Dwell Cheat Sheet
| Deposit | Cleaner | Dilution | Dwell Time |
|---|---|---|---|
| Fresh droppings | Dish soap + warm water | A few drops per quart | 2-3 minutes |
| Set-in droppings | Oxygen bleach | ~1 scoop per gallon | 5-10 minutes |
| Algae / lichen | Sodium hypochlorite + surfactant | ~1-1.5% available chlorine | 5-10 minutes |
| Mineral streaks | Acidic stucco cleaner | Per label | Per label, usually under 5 minutes |
Never let any cleaner dry on the wall. Once it dries, the chemistry stops working and the residue is what stains. Work in shade or in sections small enough to rinse before the surface flashes dry.
Test any cleaner on a small, hidden patch first, ideally near a downspout or behind a shrub. Wait for it to dry completely before judging the result. Some cleaners look fine wet and leave a chalky haze once dry.
Manage the Runoff Before You Spray
This is the step most guides skip: whatever you put on the wall comes off it, landing in your beds, lawn, and storm drain.
- Pre-wet and post-wet landscaping. Soak plants and grass within 10 feet of the wall before you start and again after you rinse, to dilute overspray and runoff.
- Cover or move anything porous. Pots, furniture, grills, and pet bowls should come off the patio before you mix a batch.
- Keep pets and kids inside until the wall is fully rinsed and dry. Sodium hypochlorite is a respiratory irritant, and oxygen bleach is a stomach irritant if a dog licks a wet spot.
- Never let runoff reach a storm drain. In most municipalities, storm drains discharge untreated to creeks and rivers. If your wall sits near a driveway that drains to the street, block the flow with a sandbag or rolled towel and mop up the puddle instead.
- Watch the weather. Pick a dry window with at least 24 hours of no precipitation forecast.
How to Prevent Bird Nesting on Exterior Walls
Cleaning is the easy half; keeping birds from returning stops you repeating the job every spring. The trick is understanding what a bird looks for, then removing it.
What Birds Are Looking For
Most nuisance birds on residential walls, pigeons, starlings, house sparrows, swallows, need three things within a short flight of each other:
- A horizontal ledge at least an inch deep to stand on.
- An overhang or recess that shelters a nest from rain and predators.
- A nearby food or water source, a feeder, a trash bin, a birdbath, a gutter that holds water.
Physical Deterrents That Actually Work
- Bird spikes on flat ledges, parapets, and window sills. Stainless steel spikes on a polycarbonate base are the standard: visible, uncomfortable to land on, and harmless to the bird. Space them so the tips cover the full landing depth, a single row on a wide ledge leaves a gap the bird will find.
- Slope guards or ledge modifiers on top of trim and sills. These angled panels turn a flat landing into a 45-degree slide, and work where spikes would be visible or ugly, like above a front door.
- Netting under eaves, over recesses, and across any opening wider than about two inches. This is the only reliable exclusion for swallows, which build mud nests tight against the wall.
- Vent and gap sealing. A gap at the roofline, a missing soffit panel, or an open dryer vent is an invitation. Seal with hardware cloth or a manufactured vent cover, not spray foam, birds will peck foam out.
Habitat Changes That Do More Than Gadgets
- Trim tree branches back at least six feet from the wall. Branches give birds a launch point and a place to watch the ledge.
- Move feeders and birdbaths at least 15 feet from the house, or take them down for a season if the problem persists. You are not eliminating birds from the yard, just from the wall.
- Keep gutters clear. Standing water is a drinking source and a breeding site for insects that attract birds.
- Remove old nests after the season ends. Many species will not reuse a nest, but the structure signals a safe spot to the next pair. Wear gloves and a mask, old nests harbor mites and droppings.
The Warranty Angle Most Guides Miss
Here is the part nobody tells you: aftermarket deterrents can affect your stucco or paint warranty.
- Read the warranty terms for your stucco system or paint. Look for language about surface penetrations and adhesives.
- Prefer mechanical fastening into framing or trim over adhesive on the stucco field. A screw into a rafter tail is reversible; a failed adhesive patch is not.
- Check with your HOA if you have one. Many restrict visible deterrents on street-facing elevations, and an unapproved install can trigger a violation on top of the warranty issue.
If your stucco warranty or HOA rules restrict surface attachments, get written approval before you install spikes or netting. A $40 box of spikes is not worth a voided finish warranty.
When Prevention Is Not Enough
If droppings keep coming back after you have sealed, spiked, and trimmed, the nesting site is still there, you just have not found it. Look up. The most common missed spots are the top of a chimney chase, the underside of a second-story eave, and the recess behind a downspout. A licensed wildlife or pest professional can identify the site and, where local rules allow, remove the birds and exclude the opening in one visit.
Common Mistakes That Damage Stucco and Void Warranties
The biggest mistake is reaching for a pressure washer, the fastest way to crack stucco, force water behind the finish, and strip paint.
Other common errors:
- Scrubbing dry droppings, which grinds them into the surface
- Using full-strength bleach, which etches the finish
- Letting cleaner dry on the wall before rinsing
- Skipping the pre-soak, which smears waste instead of lifting it
If your stucco warranty requires professional cleaning or bans pressure washing, a DIY mistake can cost you the claim. Read the terms first, or hire a licensed and insured pro.
Frequently Asked Questions
Does bird poop damage stucco walls?
Yes. Bird droppings are acidic and can etch the surface of stucco over time, leaving permanent stains and weakening the finish. The uric acid in droppings also feeds mold and algae growth. The longer droppings sit, the deeper they penetrate the porous surface. Cleaning within a few days of noticing the mess prevents lasting damage and keeps your exterior looking maintained.
Can I use a pressure washer on stucco to remove bird droppings?
No. Pressure washing stucco forces water into the porous surface, which can crack the finish, loosen the stucco from the wall, and void your home’s exterior warranty. Soft washing with low pressure and a cleaning solution is the safe method. If you hire a professional, confirm they use soft washing equipment designed for delicate surfaces.
What is the best cleaning solution for stucco exterior with bird droppings?
A mix of oxygen bleach and water works well for most droppings on stucco. For heavier stains, a diluted sodium hypochlorite solution with a surfactant helps break down uric acid. Avoid harsh acids and undiluted chlorine bleach, which can discolor stucco and damage nearby plants. Always test on a small hidden area first.
How often should I clean bird droppings off my home exterior?
Check stucco walls weekly during spring and summer when birds are most active. Clean fresh droppings within 48 hours to prevent staining. If you have recurring problems, schedule professional soft washing two to three times per year and address nesting spots with deterrents to reduce how often cleaning is needed.
Bird droppings on stucco are a health concern and a curb appeal problem, and the wrong method turns a cleaning job into a repair job. Extra Pressure LLC. is licensed and insured and uses specialized soft washing built for delicate surfaces like stucco. We provide same-day estimates and use state-of-the-art equipment to remove droppings, mold, and grime without harming your finish. Get started with Extra Pressure LLC. and restore your stucco safely.
Leave a Reply