
Last Updated: October 27, 2026
Quick Summary
Small living room staging means arranging furniture, light, and color so a compact space reads as open and calm to buyers. Keep 30 to 36 inches of clear walkway, float the sofa a few inches off the wall, and remove oversized furniture that crowds the room. One large mirror and one area rug add depth without clutter.
- Walk through your front door in daylight and note what your eye lands on first.
- Keep at least 30 to 36 inches of clear walkway between furniture groups and along the main path.
- Float the sofa 3 to 4 inches off the wall to create depth in photos.
- Clear the coffee table down to one object before photos and showings.
- Book exterior window cleaning before your first showing so the home looks its best from the street.
Table of Contents
- Start With a Buyer’s-Eye Walkthrough
- Small Living Room Staging Ideas That Make the Space Feel Bigger
- Living Room Furniture Arrangement for Small Spaces
- Clear the Clutter and Remove Oversized Furniture
- A Home Staging Checklist for Sellers With Tight Timelines
- Living Room Staging on a Budget: DIY vs. Hiring Help
- Stage for Listing Photos and Showings, Not Just for Living
- Book an Exterior Cleaning Before Your First Showing
- Frequently Asked Questions
Start With a Buyer’s-Eye Walkthrough
Walk through your front door and look at your living room the way a stranger would.
Sellers may polish the interior and forget the curb. Both matter. The National Association of Realtors consumer guide on staging a house for sale suggests photographing each room to spot what stands out, and packing away personal items before showings.
Do this walkthrough in daylight with a notebook. Ask three questions in each doorway:
- What does my eye land on first?
- Where does the space feel blocked?
- What looks tired, dark, or crowded?
Write down the answers. You now have a to-do list instead of a vague sense of dread.
Small Living Room Staging Ideas That Make the Space Feel Bigger
Small living room staging is the practice of arranging furniture, light, and color so a compact space reads as open and calm to buyers. The goal is not more stuff. It is less friction for the eye.
Lighten the Walls and the Windows
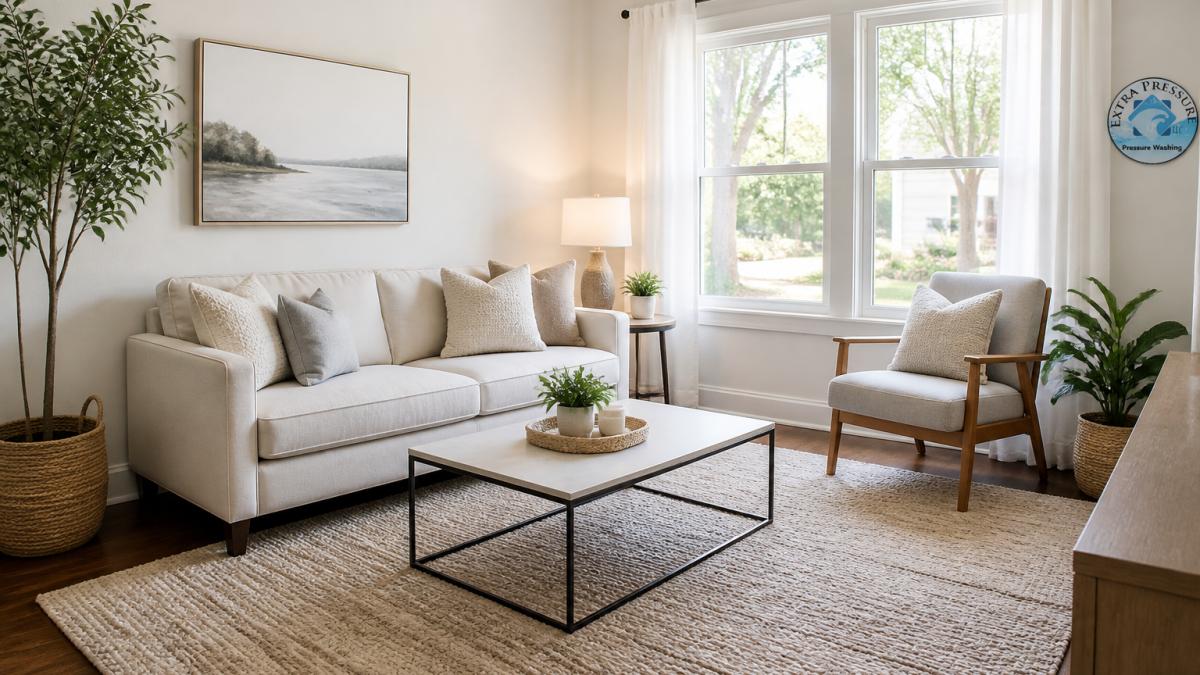
Paint is the cheapest square footage you can buy. A light neutral color on the walls makes the room feel wider and helps listing photos look clean. Skip bold accent walls in a small space; they shrink it.
Then clean the glass. You can read about what professional window cleaning costs and how often to schedule it, or learn why pure water window cleaning gives streak-free, brighter glass.
Use Mirrors and a Single Area Rug
One large mirror bounces light across the room and doubles the sense of depth. Hang it where it reflects a window, not a blank wall.
For the floor, choose one area rug big enough that the front legs of your sofa and chairs sit on it. A small rug floating in the middle of the floor makes a room feel smaller, not cozier. One rug, one mirror, done.
Living Room Furniture Arrangement for Small Spaces
Living room furniture arrangement for small spaces comes down to two rules: keep walkways clear and pull furniture off the walls. Buyers need to picture themselves moving through the room, and a clear path from doorway to doorway sells that feeling.
Measure First, Move Second
Before you touch a single piece of furniture, measure the room and the pieces. Most staging practitioners recommend keeping at least 30 to 36 inches of clear walkway between furniture groups and along the main path from the entry to the next room.
Use painter’s tape on the floor to outline each piece before you move it. This takes 15 minutes and prevents the most common mistake: buying or keeping a “smaller” sofa that still eats the walkway.
Layout Moves That Work in Small Rooms
Try these moves, in order of impact:
- Float the sofa a few inches off the wall to create depth. Even 3 to 4 inches reads as breathing room in photos.
- Angle one accent chair toward the seating area to break the boxy feel.
- Swap a bulky coffee table for a smaller round or glass one. Round tables reduce sharp corners and visual weight.
- Remove any piece that blocks a window or a walkway. A window is a selling feature; do not hide it.
- Keep at least one clear path between furniture groups. If you cannot walk through with a laundry basket, neither can a buyer.
Room-Shape Adjustments
Different small-room shapes need different moves. In a narrow room, run the sofa along the long wall and use a slim console behind it instead of a second sofa. In a square room, create a conversation circle with the sofa and two chairs, leaving the corners open. In an open-plan space, use the back of the sofa or a low console to define the living zone without building a wall.
What to Remove, Not Just Rearrange
Oversized furniture is the number one killer of small living rooms. A deep sectional that felt cozy when you bought it can make a buyer feel boxed in. If a piece crowds the room, remove it for showings, even if you love it. Store it off-site or in a garage. The goal is not to furnish the room for living; it is to furnish it for imagining.
Test your layout with a phone camera from the doorway. If the photo looks cluttered or the path looks blocked, the room will read that way to buyers too.
Clear the Clutter and Remove Oversized Furniture
Oversized furniture is the number one killer of small living rooms. A deep sectional that felt cozy when you bought it can make a buyer feel boxed in.
Then declutter surfaces. Buyers open closets and scan shelves, and clutter reads as “no storage.” Clear the coffee table down to one object.
A simple rule: if you have not used it in a year, it does not belong in the staging.
A Home Staging Checklist for Sellers With Tight Timelines
A home staging checklist for sellers should be ordered by buyer impact, not by how easy each task is. If you have one weekend, do the high-impact items first.
| Priority | Task | Time | Why It Matters |
|---|---|---|---|
| 1 | Remove oversized furniture | 1-2 hours | Opens walkways and sightlines |
| 2 | Declutter all surfaces | 2-3 hours | Makes storage look generous |
| 3 | Clean windows inside and out | 1-2 hours | Boosts natural light in photos |
| 4 | Paint walls a light neutral | 1-2 days | Makes the room feel wider |
| 5 | Add one mirror and one rug | 1 hour | Adds depth and warmth |
| 6 | Wash exterior windows and siding | Half day | Improves curb appeal and first photos |
Work top to bottom. The first three tasks change how the room photographs. The rest polish it.
Living Room Staging on a Budget: DIY vs. Hiring Help
Living room staging on a budget is mostly about knowing which jobs you can do yourself and which ones waste your time. Paint, decluttering, and furniture shuffling are solid DIY projects. Window washing on a second story, or soft washing siding with organic growth on it, may require professional help.
If your glass or siding needs cleaning, consider bringing in help and keep your weekend for the interior.
Ask any exterior provider two questions before you book:
- Are you licensed and insured?
- Do you use low-pressure methods on delicate surfaces?
Stage for Listing Photos and Showings, Not Just for Living
Staging for photos and staging for daily life are different jobs. Photos need bright, uncluttered sightlines. Showings need a room that feels easy to walk through. This is the step most sellers rush, and it is where a small living room either photographs as cozy or as cramped.
Before the Photographer Arrives
Treat photo day like a shoot, not a cleaning day. Do these in order:
- Open every blind and turn on every lamp, including floor lamps and table lamps. Overhead light alone flattens a room; layered light adds depth.
- Remove pet items, trash cans, charging cables, and remote controls. These are the details buyers notice in photos even when they do not notice them in person.
- Fluff pillows and straighten the rug. A rug pulled 6 inches off-center reads as sloppy in a wide shot.
- Wipe down glass so reflections stay clean. Streaky windows show up as haze in listing photos.
- Clear the coffee table down to one object, a book, a bowl, or a small plant. Not three.
Camera Angles That Make a Small Room Look Bigger
A smartphone camera at chest height and pointed slightly downward makes a small room look smaller. Instead, hold the phone at waist height or lower and keep it level, pointing straight ahead. Stand in the doorway or the corner farthest from the focal point. Shoot toward the brightest window, not away from it.
Avoid wide-angle distortion that bends the walls. A slight wide angle is fine; a fisheye look makes buyers distrust the listing.
Showing-Day Reset
Between showings, the room will get used. Build a five-minute reset routine:
- Turn lamps back on and open blinds.
- Put away anything that landed on the coffee table or floor.
- Straighten the rug and pillows.
- Wipe fingerprints off glass doors and mirrors.
- Empty the trash and hide the bin.
Keep the room cool and lit during showings. A small room that feels airy and bright photographs better and shows better. Buyers remember how a room felt, not how it was decorated.
Photo prep and showing prep overlap, but they are not identical. Photos reward light and negative space; showings reward ease of movement and a room that feels lived-in but not used. Do both, and reset between them.
Book an Exterior Cleaning Before Your First Showing
Curb appeal is the first staging step, and it happens before anyone steps inside. Buyers see the exterior in the listing photo and again at the door.
That is where we come in. Extra Pressure LLC. provides licensed and insured pressure washing, soft washing, window cleaning, and gutter maintenance, with same-day estimates and specialized soft washing for delicate surfaces.
If your sale timeline is tight, book exterior window cleaning before your first showing so the home looks its best from the street.
Frequently Asked Questions
How do you stage a small living room for sale?
Start by removing everything that does not serve the room: excess furniture, personal photos, and surface clutter. Pull the main seating off the walls and float it toward a focal point like the fireplace or windows, leaving at least 3 feet of walkway. Swap heavy drapes for lighter curtains, add one large area rug, and keep decor to three or four pieces. The goal is a room a buyer can read in five seconds: clear purpose, clear path, clear light.
What furniture should you remove when staging a small living room?
Take out anything oversized or duplicated. That usually means the second sofa, the recliner that blocks a walkway, the oversized entertainment center, and any side table that crowds the seating. A small living room stages best with one sofa, one or two accent chairs, and a coffee table scaled to the room. Store extras in the garage or a storage unit during showings, and measure the room before you decide what stays.
Can you stage a small living room without buying new furniture?
Yes. Most small living room staging on a budget uses what the seller already owns. Rearrange the seating into a conversation area, pull furniture away from the walls, remove half the accessories, and borrow a lamp or plant from another room. Wash the windows, raise the blinds, and swap in white or light-colored pillow covers. If one piece is clearly too big, remove it rather than replace it. Buyers respond more to open space than to new furniture.
How much does it cost to stage a living room?
Costs vary widely by market and by how much furniture is rented, so get a written quote before committing. A DIY approach using your own furniture costs little beyond cleaning supplies, light bulbs, and maybe a rug or pillow covers. Professional staging usually involves a consultation fee plus monthly rental for furniture and decor. Ask what the quote includes, whether pieces are removed before closing, and how long the rental runs, since a slow sale can extend the bill.
Selling a small living room starts with the outside of the house. If your windows are hazy or your siding shows organic growth, buyers notice before they reach the door. Extra Pressure LLC. offers licensed and insured exterior cleaning, same-day estimates, and soft washing that protects delicate surfaces while restoring curb appeal. Get started with Extra Pressure LLC. and put your home’s best face forward before your first showing.
