
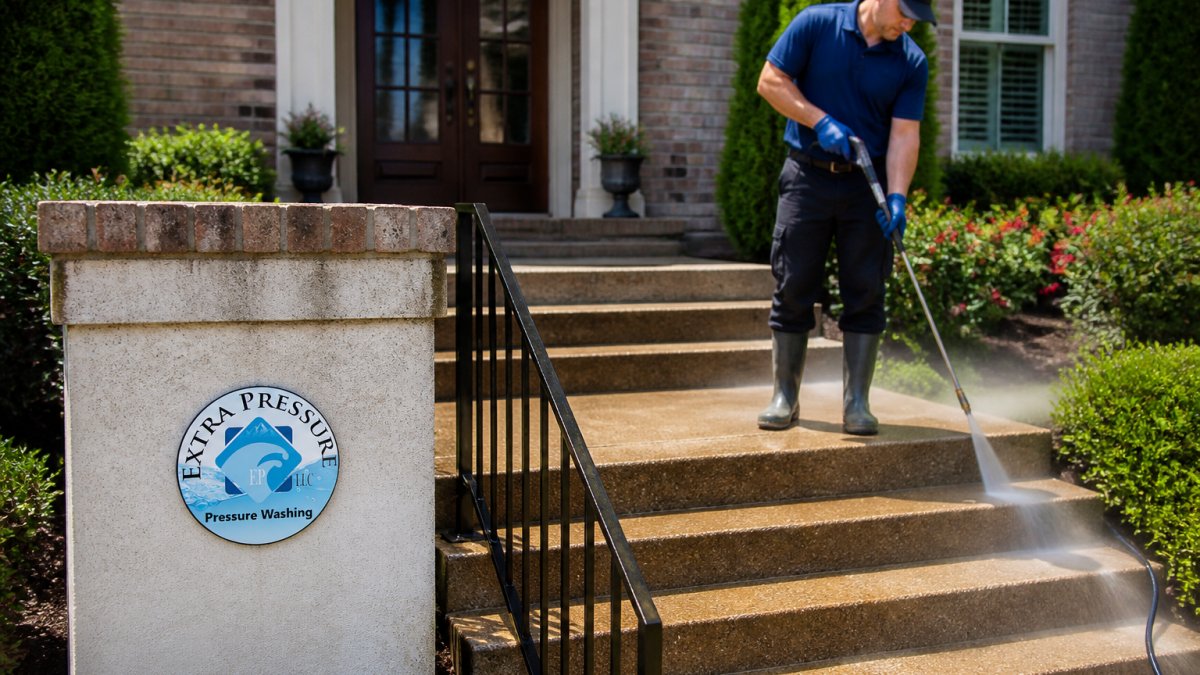
Last Updated: November 1, 2026
Quick Summary
The cheapest DIY curb appeal projects on a budget start with a walk around your own house, not a trip to the hardware store. Pressure washing house exterior surfaces delivers the biggest visible change for the least money, and small fixes like painting the front door, cleaning windows, and trimming shrubs frame the house without a contractor.
- Rank each audit item by safety first, then visibility, then cost.
- Work top to bottom when pressure washing so dirty water does not streak clean areas.
- Keep vegetation at least a foot away from the exterior to avoid feeding mold growth.
- The entry is the most-photographed square footage of the house, so refresh it early.
- If a defect is a safety issue or actively causing damage, repair it.
Table of Contents
- Start With a Cheap Curb Appeal Audit Before You Spend a Dime
- Pressure Washing House Exterior: The Highest-Impact Budget Project
- Cheap Curb Appeal Ideas for Doors, Windows, and Trim
- DIY Landscaping Ideas on a Budget That Frame the House
- How to Improve Curb Appeal Before Selling Without Wasting Money
- Repair or Replace: A Budget Decision Framework for Sellers
- Book a Professional Exterior Cleaning Before Your Listing Photos
- Frequently Asked Questions
Start With a Cheap Curb Appeal Audit Before You Spend a Dime
The cheapest DIY curb appeal projects on a budget start with a walk around your own house, not a trip to the hardware store. Grab a notepad and list what a buyer would notice from the street.
Here is the audit checklist we suggest:
- Stand at the curb and photograph the front of the house
- Check gutters and downspouts for stains or overflow
- Look for green or black streaks on siding and fascia
Rank each item by safety first, then visibility, then cost. That order keeps you from spending money on small details while a bigger problem sits in plain sight.
Pressure Washing House Exterior: The Highest-Impact Budget Project
Pressure washing house exterior surfaces delivers the biggest visible change for the least money. Grime, mold, and algae build up on siding, walkways, and driveways over time, and they make a well-kept home look tired.
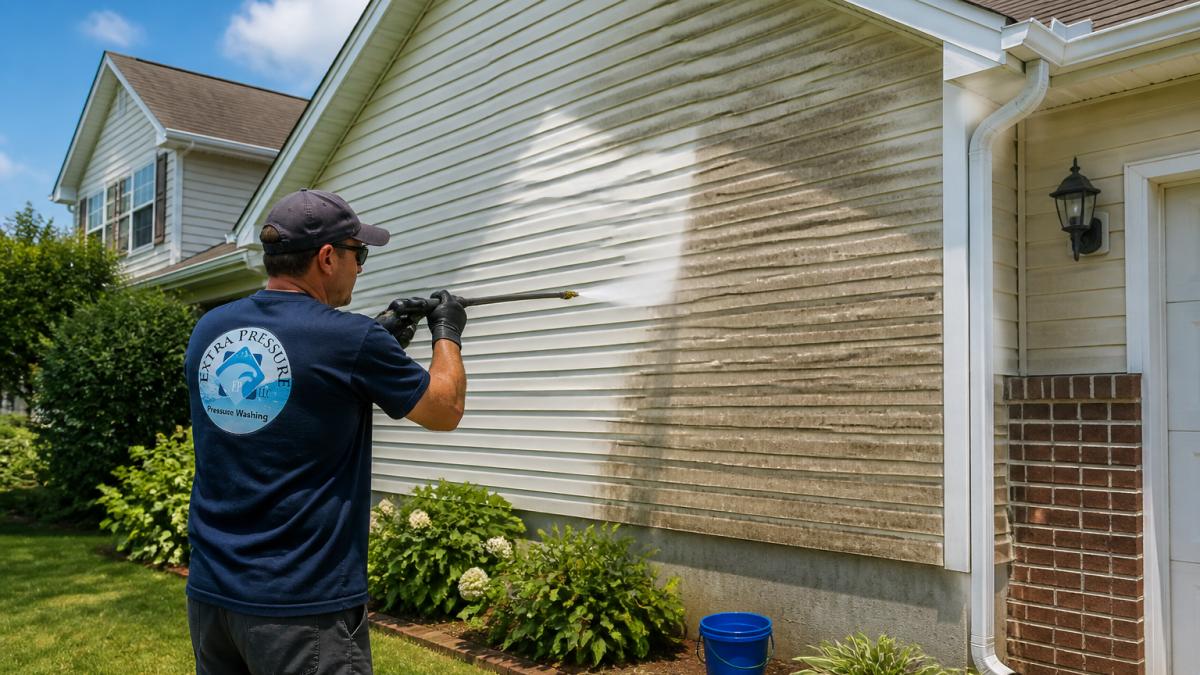
A few things matter more than the machine itself:
- Match the pressure to the surface, since delicate surfaces such as painted wood and siding can be damaged by high pressure.
- Work top to bottom so dirty water does not streak clean areas.
- Rinse plants before and after, and keep chemicals off landscaping.
If you would rather not risk it, consider a professional. You can also read how to prepare your home for professional pressure washing before a crew arrives.
Cheap Curb Appeal Ideas for Doors, Windows, and Trim
Cheap curb appeal ideas rarely need a contractor. A fresh coat of paint on the front door, new house numbers, and a clean doormat change how a house reads from the street.
Windows deserve attention too. Streaky glass and dirty sills are one of the first things people notice. If your windows are high or hard to reach, professional window cleaning for homes is an option.
Trim work is where small money goes far:
- Recaulk gaps around windows and doors
- Scrape and touch up peeling paint
- Replace rotted trim boards before they spread damage
DIY Landscaping Ideas on a Budget That Frame the House
DIY landscaping ideas on a budget should frame the house, not hide it. Trim overgrown shrubs back from windows and siding. Keep vegetation at least a foot away from the exterior, because plants hold moisture against the surface and feed mold growth.
Then focus on edges:
- Refresh mulch beds for a clean line
- Edge the lawn along walkways and driveways
- Add a few potted plants by the entry
You do not need new plantings to make a yard look cared for. Clean lines and trimmed beds do most of the work.
How to Improve Curb Appeal Before Selling Without Wasting Money
To improve curb appeal before selling, spend on what buyers see first and skip the rest. Sellers lose money when they renovate rooms buyers plan to change anyway. The front of the house is different: it sets expectations before anyone walks in.
Sequence the work in the right order
The order matters as much as the list. Work from cheapest and most visible to most expensive and least visible:
- Declutter and clean. Remove dead plants, cobwebs, and debris. Wash the exterior, windows, and walkways. This step costs little and photographs well.
- Fix safety and active-damage items. Loose handrails, trip hazards, active leaks, and exposed wiring come next. These are what an inspector will flag.
- Refresh the entry. Paint the front door, replace house numbers, add a clean doormat, and update the porch light. The entry is the most-photographed square footage of the house.
- Tidy the landscape. Trim shrubs back from the siding, edge the beds, refresh mulch, and pull weeds from cracks. You do not need new plantings to make a yard look cared for.
- Touch up paint and caulk. Scrape peeling trim, recaulk gaps, and repaint where needed. Small cost, big visual gain.
- Handle the roof and gutters. Clean gutters, reattach loose downspouts, and address any obvious roof issues. These are the items buyers and inspectors look at first.
Decide what to repair versus what to disclose
Not every defect needs to be fixed before listing. A clear distinction helps:
- Repair before listing when the defect is a safety issue, is actively causing damage, or is something a buyer’s inspector will flag as a dealbreaker. Completed repairs with receipts build buyer confidence.
- Disclose known issues when the defect is cosmetic, age-related, or something the buyer is likely to renovate anyway. Disclosure requirements vary by state and by what you know, so confirm the rules that apply to your listing before you decide.
- Offer a credit at negotiation when the buyer may prefer to choose the contractor and the finish. A credit often closes a deal faster than a seller-managed repair.
A simple rule: if it is a safety issue or is actively causing damage, repair it. If it is cosmetic or age-related, disclose it and let the price reflect it.
Keep a repair file as you go
Documentation pays off at inspection and at closing. Keep a simple file with:
- Permits and inspection sign-offs for any permitted work
- Invoices and receipts for every repair, even small ones
- Warranties for roofing, siding, windows, and appliances
Buyers and their agents read documentation as evidence of care. It also supports the disclosures you are required to make.
Avoid the most common overspend
The biggest waste is renovating rooms buyers plan to change anyway, kitchens and bathrooms top the list. The second biggest is buying new plantings before cleaning up what is already there. Wash the exterior, clean the windows, clear the entry, and trim the beds first. Our pre-listing home inspection repair checklist helps you sort what matters from what does not.
Photograph every project as you finish it. A dated before-and-after set is the cheapest marketing you can do, it builds buyer confidence and doubles as documentation for your disclosures.
Repair or Replace: A Budget Decision Framework for Sellers
Use this framework before you spend on any exterior item. It helps you decide what to fix, what to disclose, and what to price into the listing.
Step 1: Sort by safety, severity, and cost
Rank every defect on three axes before you open your wallet:
- Safety first. Loose handrails, exposed wiring, missing outlet covers, and trip hazards on walkways come before cosmetics. These are the items an inspector will flag and a buyer will use to renegotiate.
- Severity second. Active water intrusion, soft wood, and failing roof flashing get worse every rain. Addressing small problems early can prevent larger repairs later.
- Cost third. Once safety and severity are handled, spend on the highest-visibility, lowest-cost items, cleaning, paint touch-ups, fresh mulch, and new house numbers.
A common pattern among sellers is to invert this order, buying decorative items while more serious problems go unaddressed.
Step 2: Match the repair to the right trade
Some exterior work is genuinely DIY-friendly. Other work carries real safety, permit, or warranty risk if you handle it yourself. Use this trade-by-trade guide:
| Task | DIY or pro? | Why |
|---|---|---|
| Pressure or soft washing siding | DIY with care | Wrong pressure or nozzle can pit wood and strip paint; soft washing is safer for painted surfaces |
| Recaulking windows and doors | DIY | Low risk, low cost, stops water intrusion |
| Scraping and repainting trim | DIY | Prep work matters more than skill; lead-safe rules apply to pre-1978 homes |
| Cleaning gutters and downspouts | DIY | Ladder safety is the main risk; reattach loose sections while you are up there |
| Replacing rotted trim boards | DIY if the rot is surface-level | If the wood is soft behind the paint, the damage may extend into the framing |
| Roof repairs, flashing, or full replacement | Licensed pro | Fall risk, warranty requirements, and permit rules |
| Electrical outlets, switches, and exterior lighting | Licensed electrician | Code compliance and shock/fire risk |
| Plumbing leaks, hose bibs, and irrigation | Licensed plumber | Water damage and permit rules |
| Structural cracks, foundation, or retaining walls | Licensed engineer or contractor | Safety and liability |
When in doubt, get a quote. Many contractors offer free exterior estimates, and a written quote is useful documentation even if you decide not to hire them.
Step 3: Estimate cost and timing before you commit
Exact prices vary by region, home age, and condition, so treat any number as a planning range rather than a quote. A few rules of thumb most practitioners use:
- Cleaning: a relatively low-cost project with high visual return. Schedule it before any paint or landscaping so you are not cleaning around fresh work.
- Paint touch-ups and caulking: low material cost, but labor-intensive. Budget a weekend for trim and a full day for a front door.
- Gutter cleaning and reattachment: inexpensive if you do it yourself; a pro crew is worth it for two-story homes or steep rooflines.
Pressure washing rotted wood, old single-pane windows, or failing paint can cause real damage. When a surface is soft, cracked, or already failing, clean it gently or leave it to a professional.
Step 4: Decide repair, disclose, or credit
Not every defect needs to be fixed before listing. Sellers generally have three options:
- Repair before listing. Best for safety issues, active water intrusion, and anything a buyer’s inspector will flag as a dealbreaker. Completed repairs with receipts build buyer confidence.
- Disclose and price accordingly. Some known issues, an older roof, a cosmetic crack, a dated but functional system, are better disclosed than repaired, especially if the repair cost exceeds the value it adds. Disclosure requirements vary by state and by what you know, so confirm the rules that apply to your listing.
- Offer a credit at negotiation. A buyer credit lets the buyer choose the contractor and the finish, which often closes a deal faster than a seller-managed repair.
A simple decision rule: if the defect is a safety issue or is actively causing damage, repair it. If it is cosmetic or age-related and the buyer is likely to renovate anyway, disclose it and let the price reflect it.
Step 5: Document everything
Keep a simple repair file as you go. It pays off at inspection and at closing:
- Permits and inspection sign-offs for any permitted work
- Invoices and receipts for every repair, even small ones
- Warranties for roofing, siding, windows, and appliances
Buyers and their agents read documentation as evidence of care. It also supports the disclosures you are required to make.
Book a Professional Exterior Cleaning Before Your Listing Photos
Listing photos freeze your house on one day, so the exterior needs to be right before the camera shows up. A professional cleaning removes the mold, grime, and streaks that read as neglect in photos, and it holds up better than a quick garden-hose rinse.
One more step matters after the cleaning. Mold returns when moisture keeps collecting in the same spots. Our guide on how to prevent mold regrowth on your home exterior covers the seven steps that keep it from coming back.
Frequently Asked Questions
What are the cheapest ways to improve curb appeal?
The lowest-cost projects are cleaning and tidying: pressure washing walkways and siding, washing windows, pulling weeds, trimming overgrown shrubs, and replacing burned-out bulbs. A fresh layer of mulch and a new doormat cost little but change the look of the entry. Start with cleaning because it costs the least and shows the biggest before-and-after difference.
Does pressure washing improve curb appeal?
Yes. Pressure washing removes mold, mildew, dirt, and grime from siding, driveways, and walkways, and the change is visible immediately. For delicate surfaces like painted wood, vinyl, or stucco, lower-pressure methods are generally gentler than high pressure. If you pressure wash the house exterior yourself, test a small hidden area first and keep the nozzle moving. For heavy organic growth or two-story homes, a licensed professional is safer and often faster.
How can I improve curb appeal in one weekend on a budget?
Pick projects you can finish in two days: pressure wash the driveway and front walk, clean the gutters and downspouts, wash the front windows, trim shrubs away from the siding, spread fresh mulch, and replace the house numbers and porch light bulbs. Skip painting and major landscaping, which take longer. Make a short list, rent or borrow equipment, and work top to bottom so dirt from the roof and gutters does not land on surfaces you just cleaned.
What should I fix outside my house before selling?
Fix anything a buyer’s inspector will flag: loose gutters and downspouts, rotted trim, damaged weatherstripping, cracked caulk around windows and doors, and exterior outlets or fixtures that do not work. Clean the roof and gutters, and pressure wash the siding and walkways. Keep receipts for every repair, because disclosure rules require you to tell buyers about known defects. A pre-listing inspection helps you find problems before a buyer does and decide what to repair versus disclose.
Your exterior is the first thing buyers, guests, and tenants judge, and it is the easiest part of a property to improve. Extra Pressure LLC. is licensed and insured, offers same-day estimates, and uses specialized soft washing to clean delicate surfaces without damage. We also handle gutter maintenance that protects your fascia and foundation. Get started with Extra Pressure LLC. and put a cleaner, sharper exterior in front of every visitor.
